So I recently saw a linkedin post where the guy created his resume using node js module. So if you wanna impress your recruiter or interviewer you can just share your npm package. This have become easy because we have a library which already provide with the template, we just have to populate the data.
So we are going to use oclif to create a template so we can use the command line.
We will perform following steps
- Create a template for command line using oclif
- Populate command as per your need
- Link the command so we can use the command directly, instead of ./
- Publish to npm (not covered in this article)
Step 1: Create a template
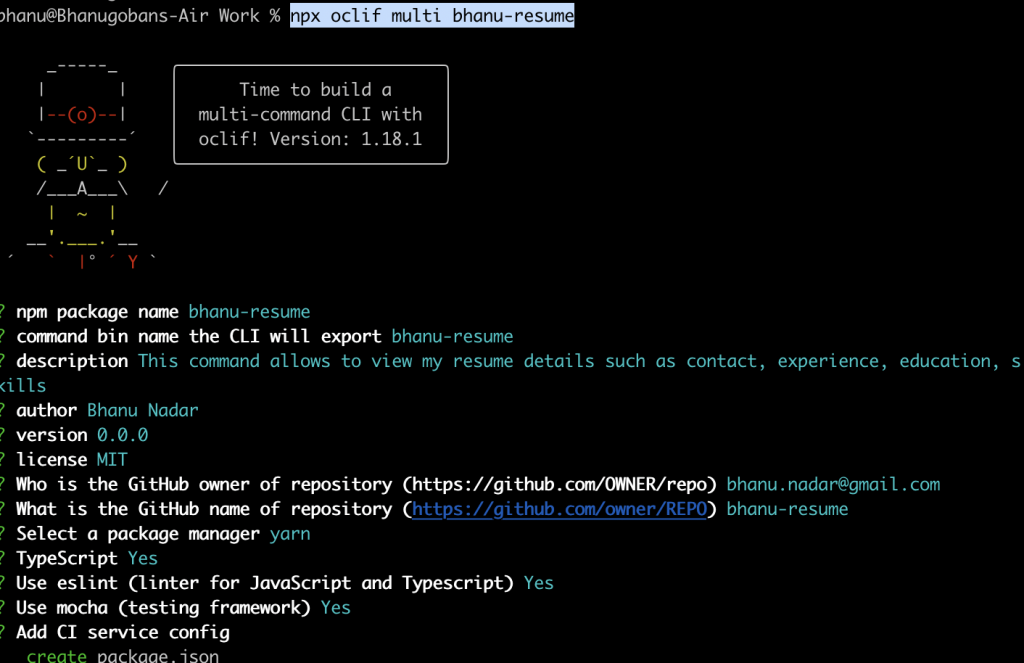
npx oclif multi bhanu-resumeThis will start creating the template, you will have to fill some data please refer below image

Verify by running following command
./bin/run helpStep 2: Populate the data I’ll be adding only contact details, but it will be enough you will get the idea of how to proceed further.
The command folder is where you keep all the commands you wanna support, in our case it will be contact, education etc. Example contact.ts
Here our command will be contact which supports flags like a,e,p for all, email and phone respectively. We write our logic in async run (), here i have done simple flag check but possibilities are many.
Now run the command.
./bin/run contact -a
Step 3:
Now we don’t want to type ./bin/run everytime instead I want to type something else. by default it will be the project name, but you can change that from package.json under bin property.
Run following command
yarn linkNow you can run your command directly.
bhanu-resume contact -aStep 4:
Publish to npm. please refer this link
Project repo