Thymeleaf is a popular and highly extensible templating engine for Java applications. It’s known for its simplicity and natural templating abilities. If you’re working on a Micronaut project and looking to integrate Thymeleaf for server-side rendering, you’re in the right place. In this blog post, we’ll walk you through the process of integrating Thymeleaf into your Micronaut application.
Step 1: Add Dependencies
The first step is to add the necessary dependencies to your build.gradle (for Groovy) or build.gradle.kts (for Kotlin) file. Open your project’s build file and add the following dependencies:
dependencies {
   .....
   implementation("io.micronaut.views:micronaut-views-thymeleaf")
   implementation("org.thymeleaf:thymeleaf")
}
Step 2: Configure Thymeleaf Template
In your Micronaut project, you need to configure Thymeleaf Engine. Add following class for the configuration
package com.example.common

import io.micronaut.context.annotation.Bean
import io.micronaut.context.annotation.Context
import org.thymeleaf.TemplateEngine
import org.thymeleaf.templatemode.TemplateMode
import org.thymeleaf.templateresolver.ClassLoaderTemplateResolver
import java.nio.charset.StandardCharsets

@Context
class ThymeleafTemplateConfig {

    @Bean
    fun thymeleafTemplateEngine(): TemplateEngine {
        val templateEngine = TemplateEngine()
        templateEngine.addTemplateResolver(htmlTemplateResolver())
        return templateEngine
    }

    @Bean
    fun htmlTemplateResolver(): ClassLoaderTemplateResolver {
        val pdfTemplateResolver = ClassLoaderTemplateResolver()
        pdfTemplateResolver.prefix = "classpath:/templates/"
        pdfTemplateResolver.suffix = ".html"
        pdfTemplateResolver.templateMode = TemplateMode.HTML
        pdfTemplateResolver.characterEncoding = StandardCharsets.UTF_8.name()
        return pdfTemplateResolver
    }
}
Step 3: Create a Thymeleaf Template
Create a views folder under /src/main/resource/ and add a html file
<!DOCTYPE html>
<html lang="en" xmlns:th="http://www.thymeleaf.org">
<head>
    <meta charset="UTF-8">
    <title>Thymeleaf in Micronaut</title>
</head>
<body>
<h1>Welcome to Thymeleaf in Micronaut!</h1>
<p th:text="${message}"></p>
</body>
</html>
Step 4: Create a controller to test the feature
Now, let’s create a Micronaut controller that will render the Thymeleaf template. Create a new controller class, for example, ThymeleafController, with the following code:
    @Inject
    private lateinit var templateEngine: TemplateEngine

    @Get("/test-thymeleaf")
    suspend fun testThymeleaf(): String {
        val context = Context()
        var map = mutableMapOf<String, Any?>()
        map.put("message", "This is a variable text")
        context.setVariables(map)
        return templateEngine.process("hello_world", context)
}Implementation: https://github.com/cw-bhanunadar/Micronaut-playground/pull/7
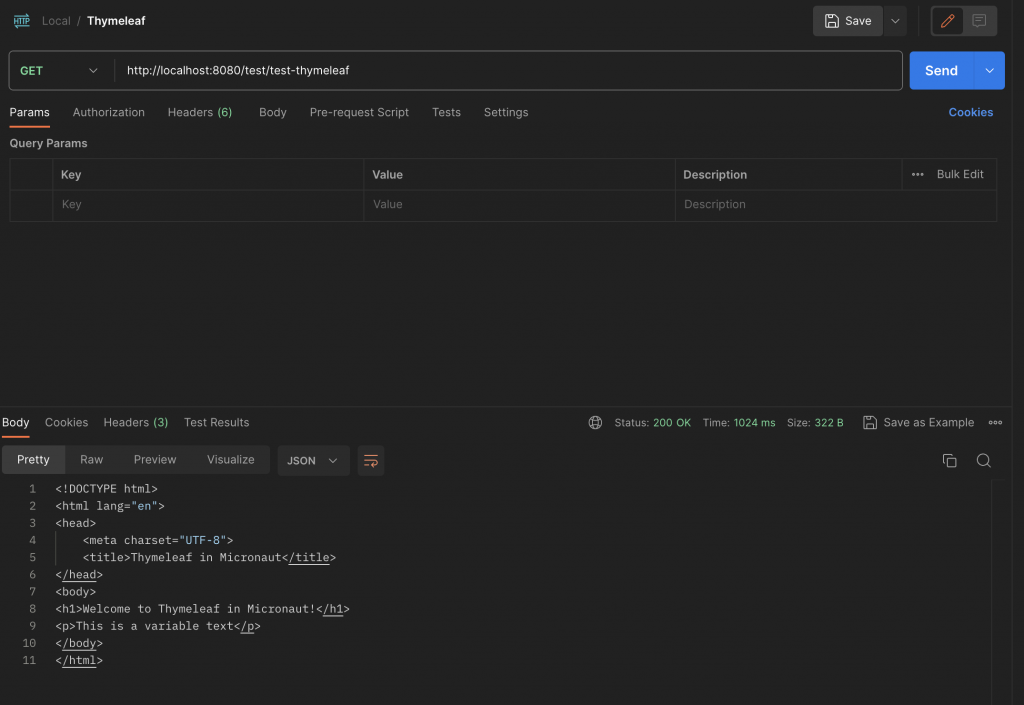
Step 5: Test it
The variable is got resolved with our expected value, we can use this HTML as partial view or inject as per our need.